Saturday, December 26, 2009

Bean Soup

Thickness of your soup will depend how much stock you add.
Good bean soup requires several important steps. The first is preparing a great ham base see my post for December 25, 2009 or click here: Kitchen Bounty: Soup Base for Ham, Pea, and Lentil Soup

Second is soaking the beans overnight. DO NOT ATTEMPT to make bean soup without this important step unless you wish to contribute to the depletion of the planet's ozone layer due to uncontrolled gases! I put my beans in a colander and then place that in a large bowl and fill it with water several hours before going to bed. Then I lift out the colander, throw out the water, rinse the beans, and fill the bowl with water yet again. I do this several times. It will make your beans much more "friendly."

I love sweet vermouth with bean soup. Sweet vermouth is like the taste of autumn and complements the soup. You may omit it. If you do, just add one cup more stock.

It's important to let the soup simmer for several hours and even more important to taste it periodically. Keep some extra ham stock on hand (or a can of chicken stock) to add if the soup becomes too thick.

Like most soups, this improves with age and is even better the next day. I like to sprinkle fresh Parmesan cheese on top of each bowl when I serve it. I always served a pot of this soup at my autumn open house at my art studio along with apple crisp. They were both always a smashing hit.


  • 1, 16-ounce package dried navy beans
  • 4-5 cups ham stock
  • 1, 14.5 ounce can whole tomatoes, broken apart, including the juice
  • 1 cup sweet vermouth
  • 1/2 cup diced celery
  • 1/2 cup diced carrots
  • 1 cup chopped onion
  • 2 heaping teaspoons minced, fresh garlic
  • 1-2 cups chopped ham
  • 1-2 tablespoons Worcestershire sauce
  • 1 tablespoon dried parsley
  • 1/2 teaspoon ground black pepper
  • 1 bay leaf
  • Additional stock
  • 1 smoked ham hock or ham shank, rinsed
  • 2 whole cloves (optional) each tied with a thin piece thin of twine (to make it easy to remove)
  • red pepper flakes (optional)
Combine the soaked beans, stock, veggies, ham and seasonings in a large stockpot and bring to a slow boil. Reduce heat to low and simmer, covered for two hours.

After two hours, taste for seasonings. Add the ham hock or ham shank, the cloves and a pinch or two of the red pepper flakes if desired. Stir. Add more stock if necessary. Cover and continue to simmer for another hour or two, longer if you have the time. After several hours, remove the cloves, the bay leaf, and the ham hock or shank. Ladle into bowls and enjoy.

I never add salt to a ham-based dish since ham is usually pretty salty to begin with. If you don't have extra ham for the soup, have the deli counter cut you several one-half inch slices. "Ham Off the Bone" is a common deli cut that works well.

Friday, December 25, 2009

Soup Base for Ham, Pea, and Lentil Soup

http://www.kamado.com/discus/messages/1/38421.jpg

Winter is SOUP TIME! I always make a ham base for my bean soups. It's really quite easy and makes all the difference, especially since one doesn't always just happen to have a "ham bone" on hand.

  • 2-3 pounds smoked ham shanks or smoked ham hocks or smoked ham neck and back bones or a combination
  • 1 onion roughly cut
  • 2-3 whole cloves
  • 1-2 carrots, cut into fourths
  • 1-2 celery stalks, cut into fourths
  • about six cups of water

Rinse the ham "parts" really well and place into a stock pot. Fill with water and swirl then drain to clean bones even more. Add the rest of the ingredients and add water until covered. Bring to a SLOW boil and then immediately lower to a simmer. Skim off foam. Cover and simmer for 8 hours. I usually put it on the stove before I go to bed. An electric stove works best for this. You will get a clearer stock if it doesn't boil.

When cool enough to handle, strain through a colander. And then strain through a sieve. You'll have a rich broth with which to make soup. Place in the refrigerator overnight and remove the fat that rises to the top. You'll be left with a very rich and gelatinous stock with which to make a great bean soup. You can store this in the freezer. I like to use 3-4 cup tupperware-like containers.

Recipe for bean soup is here: Kitchen Bounty: Bean Soup

Wednesday, September 30, 2009

Apple Crisp


I probably make apple crisp more often than apple pie simply because it's easier. If you have my first book of essays, "Appreciating the Simple," I've written on the "art" of apple-pie making. If not, I'll summarize here: Please, use a variety of apples for the best taste, always including one or two Red/Gold Delicious (the exception, I think, are Honey Crisps). Lemon juice brings out the taste of the apples; you don't need much. A bit of allspice added to cinnamon makes the best apples. If the apples are tart, use more sugar; if sweet, use less. Keep your apples stored in a cool place or they will begin to go soft and grainy. Bring to room temperature before slicing.

(FYI: Here in the states, we make the crisp using raw apples. In England and most of Europe, they begin with a quick sauté  in a shallow pan to soften them up. Something to think about, since it allows you the choice to add seasonings to taste as you go.)

I like this recipe because the topping uses melted butter as opposed to the more familiar whole butter one must work into the ingredients. It produces a "crisp" crisp with a bit of crunch even the next day (if it lasts that long). The combination of baking powder and soda causes the "crisp" to rise a bit and brown.

To be truthful, I always use apple-pie spice. I think it is the tastiest. And it's what my would have used ...

8-10 cups all-purpose apples, peeled, cored and sliced*
1/2 cup white sugar
1 tablespoon all-purpose flour
1 teaspoon ground cinnamon
1/4 teaspoon allspice
1/2 teaspoon vanilla
1-3 teaspoons fresh lemon juice
1-2 tablespoons water

Topping
1 cup "old fashioned" oats
1 cup all-purpose flour
1 cup packed light brown sugar
1/4 teaspoon baking powder
1/4 teaspoon baking soda
1/2 teaspoon cinnamon
1/8 teaspoon allspice
1/2 cup butter, melted

*There's really no need to "core" apples unless you are planning to stuff them. Simply peel and begin slicing around and as near the core as possible. Slice into desired thicknesses. If the apples are crisp, make your slices thinner; if the apples are soft, make the slices thicker otherwise they will bake into applesauce.

Place sliced apples into a large bowl. Sprinkle with the lemon juice and vanilla. Toss. Mix the flour, white sugar and spices together. Mix into apples and toss until well coated.

Spray or butter a 9 x 13 glass baking dish. Evenly spread out the apples. Sprinkle with the water. (Here's what I do: run your hand under cold water and shake/sprinkle it over the apples. Do this several times. Works like a charm.) You don't want a lot of water, just enough to make a nice "syrup" when they bake.

Mix the topping ingredients until crumbly. Evenly spread over the apples. Bake for about 45 minutes in a 350-degree oven. Check the center to see if the apples are done. If not, cover with foil and return to oven for about 10 more minutes. Serve warm.

This recipe is easily halved. Place in an 8 x 8 pan or dish. Make sure you use Quaker Oats that reads "old fashioned" on the front. I've used the quick oats but you won't get as crisp a crust.

Tuesday, September 8, 2009

Crescent Roll Cheese Cake Squares (Easy Mexican Sopapilla)


Served warm from the oven or chilled from the fridge, these easy-to-prepare cheese squares
are destined to hit the bull's-eye-of-approval from family and friend.

I wasn't really sure what to call this. Or how to categorize it. I used to make a similar recipe years ago that was simply dusted with powdered sugar. I prepared this one for the usual Sunday morning "surprise." Served warm it's wonderful. Refrigerated, it's even better. The recipe is easily halved. It's now possible to buy crescent rolls in a single sheet instead of being perforated to separate into rolls.

The cream cheese is absorbed into the flaky pastry leaving a wonderful custard-like middle. The sugar topping provides just the right amount of "crunch."

FILLING
  • 1, 8-ounce pacakage softened cream cheese
  • 1 cup white sugar
  • 1 teaspoon vanilla extract
  • 2, 8 ounce packages refrigerated crescent rolls
TOPPING
  • 1/2 cup melted butter (you won't use it all)
  • 1/2 cup white sugar
  • 1 teaspoon ground cinnamon

Preheat oven to 350 and spray a 9 x 13 baking pan.

Beat the cream cheese with the sugar and vanilla until smooth.

Unroll one package of crescent rolls and roll to fit into the pan. If using the non-perforated kind, it is already shaped to fit. Spread the cream cheese mixture evenly over the layer and top with the remaining sheet of dough.

Stir together the sugar and cinnamon.

Liberally brush the top layer with the melted butter. When you think it's too much, brush with more. Evenly sprinkle the sugar/cinnamon mixture over the top.

Bake for 30 minutes until the dough has puffed and the corners are golden brown and sugar has absorbed the butter and is a solid crisp layer. Cool at least 20 minutes before slicing. Store leftovers in refrigerator.

Saturday, September 5, 2009

Pasta with Garlic, Olive Oil and Parmesan

Reheating Pasta

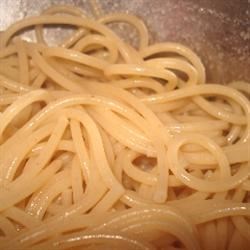
When we think pasta, we tend to think of sauces. That's too bad, because pasta on its own is a simple delight and a great side for most meals. And it's pretty inexpensive, too. Add some diced, grilled chicken or shrimp, and you have an instant meal.

Pasta ABSORBS a lot of liquid. That's just what you want. And it requires a lot of salt. I find that 2-3 garlic cloves work best. Use less or more if that's your taste--but not much more.

If you have access to Italian-made pastas, by all means use them for this recipe. Italian pastas, available in many shapes and sizes, have a better taste and "bite" than American-made counter parts.

  • 1 box pasta, such as angel hair, spaghetti, vermicelli, linguine
  • 2-3 garlic cloves, peeled
  • 1/2- 3/4 cup light olive oil
  • 2 tablespoons unsalted butter
  • 2 cups finely shredded Parmesan cheese
  • 1 tablespoon sea salt or other "non-table" salt
  • Freshly-ground black pepper
  • Fresh-grated lemon zest (optional)
  • Fresh basil leaves (optional)

Bring a large pot of salted water to a boil.

Meanwhile . . . get out the largest non-plastic, non-metal bowl you have, preferably with a flat bottom. Into it, "zest" your peeled garlic using a fine micro plane or a garlic press. (I highly recommend the micro plane). Lacking both, finely mince your garlic. Sprinkle with table salt and using the back of a large, flat knife, press back and forth until a paste forms. Lacking that initiative, mash the garlic in a mortar and pestle. Lacking that . . . well, you shouldn't be cooking.


A micro plane. No kitchen should be without one!

Place the garlic in the bottom of your bowl. Add the olive oil. Add the tablespoon of salt and about 20 grinds of fresh, black pepper. Stir. Dot with the butter and set aside. If using, add several grates of lemon zest.

Meanwhile . . . Using your trusty micro plane, zest about 2 cups from a wedge of Parmesan. The micro plane will make it nice and fluffy so it melts instantly into the hot pasta.

Add 1 box of pasta to the boiling water. Bring back to a boil and cook according to package directions. If using angel hair pasta, do not walk away from the pot! Angel hair pasta cooks within minutes and you don't want a clumpy mess.

When pasta is done, turn off the heat. Do not drain your pasta! Using a pasta ladle, remove the pasta from the water and add to the bowl containing your garlic, olive oil, salt, pepper and butter. Don't worry if water gets in--you want some. Pasta will absorb it. Mix the oil mixture into the pasta. Sprinkle half the cheese of top and combine. Then add the rest and combine some more. (At this point, I often just use my hands to mix everything.) Taste and add more salt and pepper if necessary. If you wish, add some freshly-minced parsley to it and sprinkle with a bit more cheese. If desired, sprinkle with a chiffonade of basil leaves.


TIP: To keep the pasta warm while you get the rest of the meal together, place a cloth dish towel over the pan of pasta water (be sure heat is off and away from other burners that may be on). Now set your bowl of pasta on top of it. The trick is not to let the bowl come into contact with the hot metal thus avoiding a crack. Cover the pasta with a sheet of cling wrap. Stir just before serving.

Enjoy.


Tuesday, September 1, 2009

Coleslaw


Coleslaw needn't be a boring affair. Often, it's too bland. Or sodden with vinegar. One wants to achieve that balance between sweet and tangy. If you like the coleslaw at KFC, you'll probably like this. It's a cinch to prepare and pre-packaged slaw mixes cut the prep time in half.


The word itself is a blend of Dutch and French. Kool in Dutch means "cabbage." Sla a reduced form of the French "salade." The blending is uniquely American--Cole-Slaw.

  • 1, 16-oz. bag shredded cabbage or 2, 10 oz. bags
  • 2, carrots, peeled and shredded
  • 2-4 tablespoons finely-minced parsley
  • 2/3 - 1 cup mayonnaise
  • 3 tablespoons vegetable oil
  • 1/2 cup white sugar
  • 2 tablespoons white vinegar or rice vinegar
  • 1/4 teaspoon salt
  • 1/2 teaspoon poppy seeds

In a very large bowl, combine cabbage and carrots.

In a medium bowl, whisk together the mayo, vegetable oil, sugar, vinegar, salt and poppy seeds. Taste. Add more vinegar if necessary.

Pour dressing over the slaw and mix thoroughly.

Refrigerate a couple hours before serving.

NOTE: You can use Miracle Whip salad dressing, but lessen the amount of vinegar called for.

Thursday, August 13, 2009

Rhuberry-Pie


Who doesn't love pie? More importantly, who doesn't love pre-made pie crusts? Just roll 'em out, fill, cover and bake. What could be easier? I know there are "purists" who insist on lard in their crusts (and I agree). But, guess what? (Am I using too many questions for this blog?) Most pre-packaged pie crusts are made with lard. That's why they're so good.


Anyway, I wanted a pie and I wanted it fast. But I didn't have enough berry ingredients. On hand were a few stalks of rhubarb, a half-filled large container of strawberries and some leftover blueberries. I put them all together and created what I now call a RHUBERRY PIE! You have to try it! Let me know if you do? It's my FAVORITE pie!!!

  • Two-crust, 9-inch pie dough
  • 2 cups chopped/diced rhubarb*
  • 2 cups sliced strawberries
  • 1 cup blueberries
  • 1 cup white sugar
  • 1/3- 1/2 cup flour
  • 1 teaspoon cinnamon
  • allspice
  • 2 tablespoons butter
If using pre-made crust, sprinkle with a bit of flour and roll to fit a 9-inch pie plate.

Be sure fruit is rinsed and DRY (rinse the berries the night before and allow to drain/dry. If you don't have time, put whole berries in a salad spinner). Place in a large bowl, mix together the sugar, flour, cinnamon and just a few sprinkles of allspice. Mix to blend. Add berries and carefully blend.

Pour into pie shell and dot with tiny pieces of butter. Roll out top crust. Cover pie. Tuck under edges. Crimp and flute. Cut air vents** and bake in a 425-degree oven for about 40-45 minutes until juices just begin to flow.

Allow to cool before cutting. Never, ever cut a hot pie. Never, ever cut a warm pie. Serve with vanilla ice cream or frozen yogurt--a must!

*For large stalks of rhubarb, I peel them first. Slice lengthwise once or twice and then dice. For large strawberries, I slice in half and then into thirds.

**Why do some pies have a latticed top crust? (There I go with the questions, again!) It's science. The open structure allows the steam to escape so the filling is less watery. When the pie cools and you slice it, it isn't runny. But who has time to labor over a woven lattice? Solution? Simple. Cut about 4-5 one-and-a-half-inch circles in a circle around the center of the top crust. This looks kind of neat and allows plenty of steam to escape. Take the scraps and artistically place them on the top crust, securing with a bit of water on the underside. Cut out the holes before you place the top crust on the pie.

Thursday, August 6, 2009

My Favorite Chocolate Cake


This is a perfect small cake that is easy to make and pretty fool proof. It has a great, moist texture and the frosting is . . . well . . . the icing on the cake! To make things easier, I often measure out all the dry ingredients the night before so I'm ready to go in the morning. Remember, mayonnaise is nothing more than egg yolks and oil, a perfect ingredient for cake.
  • 2 cups all-purpose flour
  • 1 cup sugar
  • 2.5 squares unsweetened chocolate, melted
  • 1 heaping tablespoon unsweetened cocoa
  • 2 teaspoons baking soda
  • 1 cup water (or strong coffee)
  • 1 cup mayonnaise
  • 1 teaspoon vanilla extract
Grease or spray a 9-inch square pan (you can also use a 7 x 11-inch pan). If you will be removing the cake from the pan in order to frost the sides, you may want to put a sheet of greased wax paper or parchment in the bottom.

Combine the dry ingredients in your favorite mixing bowl. Add the water, mayo and vanilla. Mix to stir. Add the melted chocolate and beat at medium speed until well-incorporated and blended. Pour into greased pan and bake at 350 degrees for about 30 minutes or so. The top should be slightly mounded and an inserted toothpick should come out clean. Cool before frosting.

Almond Frosting
  • 2.5 cups confectioners sugar
  • 4 ounces cream cheese
  • 1/4 teaspoon almond extract and a few drops of vanilla
  • 1 tablespoon milk
In a medium bowl, beat the sugar and cream cheese until fluffy. Add in the flavorings and milk and beat just until blended. Taste. Add more almond a drop at a time if needed. This is enough to frost the top and sides of the cake or just the top with enough left over for several very generous licks.


Thursday, July 2, 2009

Marinated Chicken on the Grill

To baste your chicken with the sauce,
remove a bit before marinating it
and then brush the chicken a few minutes
before it's done.
Nothing says summer like chicken on the grill. This is a great, easy marinade that I've used with bone-in, skin-on chicken thighs. But I expect it would work just as well with other chicken cuts, too. The dark brown sugar has a deeper, molasses taste than the light brown, but it's not a sin if you don't use the dark.

  • 3/4 cup soy sauce
  • 1/3 cup DARK brown sugar (packed)
  • 2 tablespoons fresh ginger, finely chopped or grated
  • 4 large garlic cloves, finely chopped
  • 3 lbs. chicken pieces

Mix marinade ingredients in a bowl. Lay out chicken pieces in a glass dish and cover with the marinade, turning to coat both sides. Cover and refrigerate overnight.

For bone-in, skin-on pieces: Grill over med-high heat until both sides are browned and then cook over indirect heat until done--20-30 minutes.

For boneless, skinless pieces: Grill over medium heat until cooked through, about 5 minutes per side.

NOTE: Don't use the marinade as a basting liquid since it contained raw chicken!

Saturday, June 13, 2009

Grilled Hamburgers with Blue Cheese and Sun-Dried Tomatoes


I love blue-cheese hambugers. You can purchase them in a specialty meat market, but you will pay a premium price. It's important to use ground sirloin/lean ground beef to prevent fire flare ups that will melt away the blue cheese to nothing. When forming the patties, be sure not to taper the edges to prevent burning. You want a thick burger. I like mine served plain with maybe just a smidge of mayo so I can taste the tomatoes, chives and blue cheese. I buy my blue cheese by the wedge to crumble myself. And I save the "tomato water" as the liquid when making rice. Just freeze it in a plastic bag until ready to use. Yea--I'm frugal!


2 pounds uncooked lean ground beef
1/3 to 1/2-cup diced sun-dried tomatoes
6 ounces blue cheese
1/3 cup minced fresh chives
Tobasco (several shakes)
2 teaspoons Worcestershire sauce
1/2 teaspoon coarsely ground black pepper
3/4 teaspoons salt
1/2 teaspoon dry mustard


DIRECTIONS:

Pour boiling water over sundried tomatoes and allow to soften. When cool enough to handle, remove tomatoes and squeeze out excess moisture. Dice to measure preferred amount.

In a large bowl, mix the ground beef, sun-dried tomatoes, blue cheese, chives, Tobasco sauce, Worcestershire sauce, black pepper, salt, and mustard. Cover and refrigerate for several hours.

Preheat an outdoor grill. Firmly form mixture into large, firm patties about 4-5 inches across and at least 1/2-3/4 inch thick. Grill burgers to desired doneness. Serve on rolls.

Sunday, June 7, 2009

Grilled Beef Fajitas


Apartments in North Carolina are not allowed grills on porches. How sad and miserable is that? When I lived in the Midwest, summer was all about grilling. Even winter! Let me count the ways I miss a grill beginning with this flavorful recipe. Nothing can replace a grilled, charred, smoky piece of meat flavored from wood or charcoal--even gas. 

I love home-made marinades, especially if they require refrigeration overnight, since the messy part is already done when it comes time to cook or to grill. This is such a recipe. Go ahead and slice the onions and peppers the night before, too. This is for 2-3 pounds of skirt steak. Half it for 1-2 pounds.

Skirt steak is a less expensive cut of beef (if there is such a thing in today's inflation-ridden world). You can sub flank steak, which is a bit more tender, thicker and wider. But, skirt steak, which has a bit more fat,  is known for its beefier flavor. Both tend to be on the tough side, so do not cook either until well-done. You want medium rare or rare. Thus, both do well to be marinated for tenderization. And be sure to cut against the grain with a very sharp knife.

When preparing the marinade, I suggest going easy on the salt since soy sauce already has plenty. If you don't have liquid smoke on-hand, go ahead and add a bit of smoked paprika (or add it in addition to the liquid smoke). My preferred soy sauce is Lee Kum Kee, found at specialty or Asian stores. Even World Bazaar. It has no comparison to bland super-market brands. Cumin can be powerful, so less is better than more. Or leave it out completely. I usually do.

When this is served, people often rave and prefer just the meat. Keep that in mind. And do garnish with a flurry of freshly-chopped cilantro! 

MARINADE:
  • 1/2 cup fresh lime juice (about 3)
  • 2/3 cup filtered/drinkable water
  • 1/4 cup fresh-smelling vegetable oil
  • 2 large garlic cloves, finely minced or pressed
  • 2 tablespoons white, distilled vinegar
  • 3-4 teaspoons soy sauce 
  • 1 teaspoon liquid smoke
  • 2 teaspoons salt (start will less)
  • 1 teaspoon chili powder
  • 1/2 to 1 teaspoon Cayenne Pepper--depending on taste*
  • dash or two of ground cumin (optional)
  • 1/2 teaspoon ground black pepper
  • 1/4 teaspoon onion powder
  • 2-3 pounds skirt steaks
Mix all the ingredients (except meat) in a bowl. Taste and re-season if necessary. Place skirt steaks in a 13x9x2 glass dish (not metal) or large plastic bag. Pour the marinade over meat and cover/seal securely.   If using a plastic bag, be sure to place on a pan or plate to catch and leakage should it occur. Refrigerate overnight. Turn meat several times during the marinade process to ensure uniform coverage. If you don't have time to marinate over night, allow about 2-3 hours in the marinade at room temperature, but overnight is best.


ONION AND PEPPER GARNISH
Use any combination of red, green, yellow or orange peppers.  I do not recommend commercially, pre-sliced peppers from the supermarket since they are often treated with preservatives and very very wet.
  • 2 medium, yellow onions
  • 1 red pepper
  • 1 yellow or orange or green pepper
  • 2 teaspoons soy sauce
  • 1/4 cup water
  • 1 teaspoon fresh lime juice
In a small bowl or measuring cup, mix the soy sauce, water and lime juice. Cover and set aside until ready to use.

Peel and thinly slice onions--then slice each round in half. Slice peppers lengthwise into thin strips and then cut strips in half. Toss into a large bowl and cover until ready to use.

Cook and Assemble

1. Fire up the grill. When hot, cook meat over medium-high or indirect heat heat until done. I prefer indirect. Remember, you want it rare, medium rare. Do not overcook! Flip after 3-4 minutes. Start checking for doneness after seven minutes. 

2. Meanwhile. . . drizzle a bit of oil in a large pan. When hot, add the onions and peppers. Cook just until tender and onions begin to soften. You can do this on the grill or in the kitchen. Add the soy sauce mixture and allow to cook down a bit. Remove to a bowl.

3. Remove meat to a cutting board. Cover with foil and allow to rest for at least five minutes. Using a sharp knife, slice into thin strips against the grain at a 45-degree angle.

4. Assemble meat and onion/pepper mix on individual, warmed tortillas. Serve with any of the following condiments:

sour cream
guacamole
sliced avocados
grated cheese
shredded lettuce
salsa

*Since writing this recipe, I now substitute any recipe that calls for  "red pepper flakes" or  "Cayenne Pepper" with dried Aleppo Peppers. Not always easy to find, they are so worth the search and effort. They will give you a kick, but not as intense or crazy. And they carry great flavor like a quality ground pepper. 

Sunday, May 10, 2009

Grilled Chicken Tenderloins with Rosemary/Garlic/Lemon Marinade


Living in the South, I have abundant, year-round access to one of my favorite herbs: rosemary. Here it grows to the size of a shrub and can actually be a nuisance in the garden. I recently made this marinade for chicken tenders and we devoured each and every one. I'm sure it would work well with chicken breasts, too. Just be sure not to overcook them.

Yes, it is a lot of rosemary; so, if you have a friend who grows it, neighborly ask/trade for some! The older the rosemary plant, the better the flavor. And don't throw away those woody stems. They are useful as skewers for shrimp, added to the soup pot, or a batch of peach jam for added flavor.

Not all lemons are the same. Taste first. If growing your own or fresh picked, they tend not to be as "sour." If not organic, scrub the skin before zesting. Some people don't use butter. That would be a misfortunate error. 


  • 12-16 meaty chicken tenders
  • 1/4-cup soft, unsalted butter
  • 1/4-cup olive oil
  • 1/2-cup fresh rosemary needles stripped from stems
  • 3 large garlic cloves, peeled
  • Zest from one lemon, preferably organic
  • 1/4 cup fresh lemon juice
  • Pinch or two red pepper flakes or Aleppo pepper (optional)
  • Salt and Pepper
Place butter, olive oil, rosemary needles, peeled garlic cloves, lemon zest and lemon juice in a food processor and pulse until fully blended.

Arrange washed and dried chicken tenders on a baking sheet with foil. Place close together. Sprinkle with fresh salt and pepper to taste. With a spoon, spread each tender with herb mixture. Place in refrigerator until butter sets and then cover with another sheet of foil. Allow to marinate for 3-6 hours. I find that  covering with foil works better than cling film. 

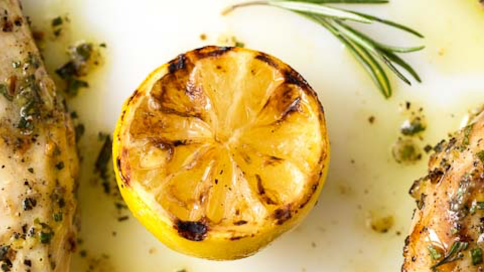
Start grill. Just before cooking, coat grill with non-stick spray. Cook tenders over medium (indirect) heat, herb mixture side up. When edges begin to turn white, carefully flip over and continue to cook--a few minutes per side. Do not overcook. When they begin to brown, that's it. If you allow for charred, black grill marks, the outer flesh will be tough and stringy. Remove to a pan and cover with foil. Allow to rest 5-10 minutes before serving. If desired, grill lemon slices/halves to use as garnish. Sprinkle with parsley or, better yet, torn basil leaves.

Note: You can save a bit of the marinade to baste the chicken while cooking or to use as extra sauce for people to brush on their chicken. I serve this with plain white rice and sauteed button mushrooms with green onions. Fresh garden tomatoes and cucumbers are also welcome.


A simple but special-and-flavorful meal.

Saturday, April 11, 2009

Baked Carrots

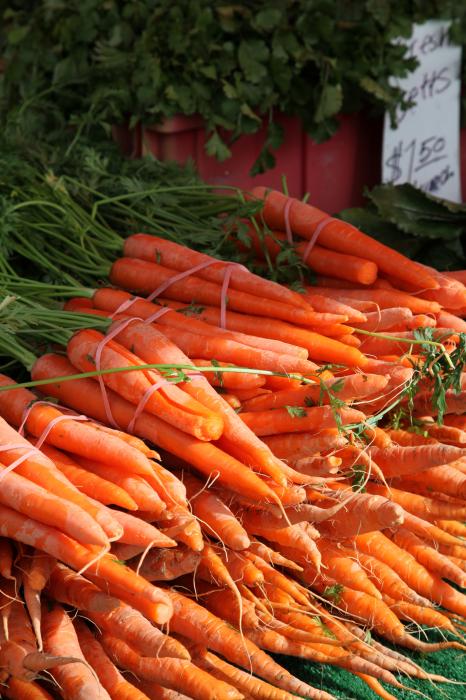
http://fineartamerica.com/images-medium/carrot-bounty-enzie-shahmiri.jpg


Once, for a dinner party, I searched everywhere for a unique carrot recipe. I wanted that orange color to go with the rest of what I had prepared. I finally found this one in my grandmother’s old cookbook. Each time I serve it for guests, they request the recipe.


  • 3 tablespoons butter
  • 1/4 cup finely chopped onion
  • 2 cups peeled, shredded carrots
  • 3/4 teaspoon salt
  • 1 teaspoon sugar
  • 1/2 cup water

Melt butter in saucepan. Add onions and sauté for about 3 minutes. Add the carrots and stir, coating with butter and onion mixture.

Place in a baking dish (about 1 quart) Sprinkle with the salt and sugar. Sprinkle the water over them. Cover and bake at 350 F until they are tender (about 30 minutes or so.)

I'm not sure what "shredded" meant, so I used a thin, matchstick slice on my mandolin, a bit thinner than the matchstick carrots you'd find already done in the supermarket. If you buy the already-prepared ones from the grocery store, just saute a bit longer before baking.

These are really good.

Tuesday, March 3, 2009

Vintage Hershey Bar Fudge


This is a super-old recipe when Baker's Chocolate was just about the only option one had when baking. And when one could actually find a 13-ounce Hershey's chocolate bar.

Chocolate has come a long way.

As a teacher, I often made this fudge as a reward for students. And I made it for Christmas Open Houses when I owned an art studio. It adapts easily to additions, such as black walnuts. Because I don’t like it too sweet, I add an extra 2 ounces of unsweetened chocolate and then 2 ounces less milk chocolate. The original recipe calls for 13 ounces each of semi-sweet chocolate and Hershey's chocolate bar. You do you.

I found a few similar recipes on line but they use evaporated milk. I have not tried that. Below is a similar recipe from the blog "Real Life Dinner" that uses the evaporated milk and mini marshmallows instead of large. Many others use Fluff. Again, I have not tried that nor do I know how many marshmallows is equivalent to one jar of Fluff. 

Evaporated milk has had the water "evaporated" from milk; hence, it's creamier. "Real Life Dinner" uses 2/3 cup evaporated milk for 1/2 of this recipe. If you double it, that would be 1 1/3 cup evaporated milk with the four cups of sugar.

Have everything measured, chopped, and ready to go. Line your pan with parchment paper and then lightly butter it. I've made this without lining the pan and it's a nightmare to remove. And do not use tin foil.

Use whole milk. Not 2 percent milk.

Avoid scraping the sides of the pot--it will make your fudge "grainy." Again, after you pour it into your pan, do not scrape the sides clean--it will make you fudge grainy. Instead, just scrape it into a separate bowl for kids to dig into.

If you half this recipe, use an 8 x 8 pan.

In a large pot, mix the following ingredients:
  • 1 cup whole milk
  • 4 cups sugar
  • 1 teaspoon vanilla
  • 1 cup real butter
Stirring, bring to a boil and boil for two minutes, stirring constantly.

Remove from heat and add:
  • 25 large marshmallows
Stir until melted.

Add:
  • 2 oz. Baker’s Unsweetened Chocolate
Stir until melted and smooth.

Add:
  • 13 oz. Baker’s Semi-Sweet Chocolate
Stir until melted and smooth.

Add:
  • 11 oz. Hershey’s Milk Chocolate
Stir until melted and smooth. Add nuts if desired.

Pour into a parchment-lined 12 x 16 metal sheet pan. Chill until set. Carefully remove from pan and remove paper. Cut using a heavy knife or bench scraper. 

Photo taken from hershey-bar-fudge

How to Grocery Shop During a Recession

A good cook will never starve. A bad one will.

The days of inexpensive food are over. The global demand has caught up with us and in the midst of a worsening economic crisis. Already it's changing our shopping and eating habits.

For example, canned meat production, such as SPAM, has never been greater. It’s exactly what a bad cook will eat, but not a good one. For about the same price, the good cook would have bought chicken or turkey parts (back, necks, gizzards) and prepared a lovely soup with veggies. (Never throw away scraps from onions, carrots, etc. Freeze in a bag and use when you make a soup stock.)

If you’re like a millions others, you no longer just whiz to the grocery store to fill up your basket with favorite brands without even looking at the price. While most generic brands are quite acceptable, some aren’t. Be wary of generic rice and grains. They can be old and have a certain “musty” taste. Always shop with store’s flyer of items on sale.

A simple loaf of a decent white bread is now as much as an artisan loaf baked at your grocery store! But a bag of bread flour is only four dollars and from it you can make your own. Trust me, your family will worship you and it's easier than you think, especially if you have a bread machine.

The variety of meat at many local grocery stores dwindles since people can’t afford the rising prices. Sales of ground beef have increased. Beef stew meat, too. Both have never been better since they use good cuts no one can afford to buy before they expire.

Many stores now have an “expiration bin.” Meats half-priced because they expire that day or very soon. Not a bad deal. As in Asian cuisine, meats need to be used for flavoring. Think chop suey.

One of the best bargains around are smoked ham shanks and ham hocks. They pack a lot of taste for soups and stews. Begin a collection of casserole recipes. They are nutritious and filling.

If you live in a rural area, shopping options are at a minimum. Ask friends who are members of big-box stores to pick up items for you and to even share. A half-gallon of olive oil, for example, is a bargain and can easily be split with another person. The same is true for dry goods and meat and poultry in bulk.

Don’t be afraid to ask for a grocery gift card for your birthday or Christmas. You can use it to “splurge” on things you normally wouldn’t purchase, such as shrimp, cheese and wine.

Be wary of purchasing food from dollar stores. But that is where you should buy cleaning supplies, laundry products, wax paper, etc.

Plastic grocery bags make great garbage bags, are perfect to use for flouring chicken and meats. Place one on a counter to easily catch vegetable peelings. Use them instead of saran wrap to cover leftovers. Try to be selective and use your re-usable grocery bag as often as possible.

Cooking takes time. Do prep work at night so it’s easier to begin the next day. Involve the family. As my great-aunt used to say, “Many hands lighten the load.”


Sunday, February 1, 2009

Meat & Potato Casserole

Inexpensive, easy, hearty and tasty: what more could one want in a casserole? Make two and freeze one! Serve with green beans, corn or mixed veggies. Look for soup, mushrooms and cheese on sale.

Serves 2-4

  • 8-ounces (1/2 pound), ground chuck
  • 8-ounces peeled, thinly sliced potatoes (about 1 large)
  • 1/2-can condensed, cream of mushroom soup
  • 1, 7-ounce can mushroom pieces and stems, drained, liquid preserved
  • 1/2-cup chopped onion
  • 2 cloves garlic, minced
  • 1/2-teaspoon dried thyme flakes, crushed
  • Pinch or two dried red pepper flakes
  • Milk, or any of the following: cream, half-and-half or evaporated milk
  • 4 slices American cheese or 1/2 - 1 cup shredded Cheddar cheese

Lightly spray a one-quart, glass baking dish, one that has a lid. Pre-heat oven to 350 degrees.

A mandolin works best to slice the potatoes. You want them about as thick as a nickel, but no thinner.

Put the mushroom juice in a measuring cup and add milk until it measures 3/4 cup. In a small bowl, combine the cream of mushroom soup and the mushroom liquid.

In a medium skillet, brown the ground chuck. Just as it begins to brown, add the onion and garlic. Cook just until meat is no longer pink.

Add the mushroom soup mixture, the thyme and red pepper flakes to taste. Bring to a slow simmer, stirring occasionally. Taste for seasonings. If too dry, add a bit more liquid or mushroom soup.

Place a few tablespoons of the meat mixture on the bottom of the casserole dish just to cover. Place a layer of potatoes on top and continue to alternate layers of potatoes and meat mixture, being sure to finish with the meat mixture. (Sometimes I add a bit more milk.)

Bake for about 30-40 minutes or until you notice it begins to bubble and the potatoes are soft. Remove from oven. Place cheese slices or cheese on top and return to oven, uncovered, just until the cheese is melted.

Notes: regular ground hamburger is pretty fatty, so I avoid it. Ground sirloin works well, too. You could use ground round, but I think ground chuck has much more flavor. It would be interesting to use ground lamb. If you don’t like thyme, go ahead and use a different seasoning. I never add salt to this since the cheese and soup have enough already.

Wednesday, January 14, 2009

Cabbage Soup

Cabbage is one of the ten things we are supposed
to be eating more. Here, it pairs well with ham shanks,
carrots and potatoes.


Here's another great recipe for the New Depression. And it's healthy, too. Cabbage is one of those veggies you are supposed to eat more of. It contains sulforaphane, a chemical said to boost cancer-fighting enzymes. Like most soups, it's open to individual interpretations. Soup broth, unlike many liquids, is immediately absorbed into your body.

2 ham shanks (not ham hocks)
1 onion roughly cut
1-2 teaspoons whole peppercorns (optional)
2 whole cloves
2-4 cups roughly-chopped cabbage
8-10 whole new potatoes, peeled (slice in half if large)
or any wax potato or turnip cut into chunks
1/2 cup chopped onion
2 teaspoons caraway seed
1 can stewed tomatoes
1 cup sliced carrots
2 teaspoons minced garlic


Prepare the Ham Stock


Rinse the shanks and add to a dutch oven or soup pot. Insert one clove into an onion section and add the roughly-cut onions. Cover with water, at least 8 cups. If you have chicken broth on hand, sub for some of the water. Bring just to a boil, reduce heat and simmer for 2-4 hours. Carefully remove the ham shanks to a bowl. When cool, remove as much meat as possible and reserve for the soup. Strain the broth. This can be done one day ahead--just refrigerate the broth until ready to use. NOTE: This is the stock one should use for bean, lentil, pea soups.

Bring broth to a simmer. Add diced onion, caraway, stewed tomatoes, carrots, potatoes. Just before the potatoes are tender, add the chopped cabbage and reserved ham. Allow to simmer for about 20 minutes until cabbage is just tender. Taste and season accordingly.

Ladle into bowls and serve with a nice rye or pumpernickel bread. Like most soups, it's even better the next day.

NOTE: Don't be afraid to substitute turnips for the potatoes, or a combo. If you don't like caraway, a bit of crushed cumin would work well, too. I've had this with neither, and it's still good.