Index

Thursday, June 30, 2011

Lemon-Strawberry Cheesecake Cookie Squares


A cookie base holds a sweet-tangy cheese cake filling.


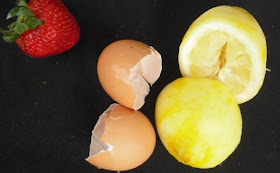
Wow! That's a long name for a recipe. But it really isn't quite a "cheese cake" in the traditional sense. This is the kind of thing sophisticated morsel you'd make if you were having a "tea" or going shopping and having some friends over afterwards. Or the perfect way to end a simple, summer meal on the back porch. In other words, it's a kind of light dessert as opposed to a huge chunk of chocolate cake. And it's perfect for spring or summer. Use the freshest and tastiest strawberries you can find. I think blueberries would be just swell, too--maybe even better!


  • 1 cup Vanilla Wafer crumbs
  • 1/2 cup flour
  • 1/4 cup cold butter
  • 1, 8 ounce package cream cheese, room temperature
  • 1/2 cup sugar
  • 2 eggs
  • 2 tablespoons all-purpose flour
  • 1 tablespoon fresh lemon zest
  • 2-3 tablespoons lemon juice
  • 1/4 teaspoon baking powder
  • 1 cup chopped, fresh strawberries
  • 2 large lemons


Preheat your oven to 350 degrees.

Spray an 8 x 8 baking pan. (This is important so the squares will remove easily when cut.)

Mix the flour in with the cookie crumbs. Using a pastry blender, cut in the butter until crumbly. Pat and press into the bottom of the pan. Bake for ten minutes. Remove.


In a medium bowl beat the sugar and cream cheese until well-blended. Add eggs, one at a time. Add the flour, baking powder, lemon zest, lemon juice. Blend well. Be careful not to over beat the mixture or the cheesecake layer will split when baking.


Carefully stir in the strawberries.

Pour onto the warm crust and bake for 25-30 minutes or just until the center is set. Remove. Allow to cool and then refrigerate.


Notes: I think melted butter would have worked just as well instead of cold butter and have been easier. Next time, I will add a layer of whipped cream to the top or serve with a dollop on top. Call me crazy, but I think layer of melted chocolate on top would by awesome, I think. To cut, dip a sharp knife in water to create clean slices. Use a micro-plane to make easy work of zesting your lemons. I think it would be interesting (and maybe cheaper) to use animal crackers instead of vanilla wafers--just saying . . .


Monday, June 27, 2011

Peach Cobbler


Sometimes I'm at a loss what to name a recipe. Recipes such as this are now called "cobblers." But, traditionally, a cobbler is a large quantity of baked fruit with spoonfuls of a biscuit-like dough randomly placed on top. This uses a thin pancake-like batter rather than a dough and the order is reversed: the fruit is placed on top. But then it sinks to the bottom. The end result is a kind of an "upside-down cake" without being turned upside down. Does that make sense?

Whatever one names it, the consensus is in the taste. My neighbor recently voted it "five oinks." The edges become chewy like a brownie and the cake-like interior with the fresh peaches and the flaky cinnamon top is the stuff dessert heavens are made of.

It's important to cook your peaches until a thick syrup is reached. If your syrup is too runny, your cake may not rise as well. You'll be tempted to dig into this as soon as it leaves the oven. Don't. Allow to cool a bit. Honestly, it's even better the next day, if there's any left.

If peaches were flowers, they'd look something like these on my back porch. Nothing says summer
like the unfortunately-named black-eyed Susans. Unless it's biting into a ripened peach.


Peaches:
4-5 fresh, firm peaches
1/4 cup dark-brown sugar, packed
1/4 teaspoon almond extract (optional but recommended)

Batter:
1 cup flour
1 cup milk
1 cup sugar
2 teaspoons baking powder
1/4 teaspoon salt
1/2 teaspoon vanilla
Several grates of fresh nutmeg

Topping:
2 tablespoons sugar
1/2 - 1 teaspoon cinnamon

Assembly:
1, 2-quart baking dish (10 x 7 x 2)
1/2 cup butter


To slice the peaches: Using a sharp paring knife, slice all around the peach and then across its equator so it's cut into quarters. Pull the quarters away from the pit and slice each quarter in half and then just peel with the knife. If peaches are "cling-free" it's a pretty easy process.

Place slices in a small bowl. Sprinkle with the brown sugar Cover and refrigerate overnight. The next day the peaches will have made a lovely syrup. You should have about 1 - 1.5 cups of peaches (around 16 ounces).

Preheat oven to 400 F. Have your batter ingredients measured and ready to go.

Place peaches in a small pan and bring to a slow boil over medium heat adding about 1/4 teaspoon almond extract. Cook until juices thicken to a kind of syrup. Remove from heat. (Note: if your peaches are very ripe and soft, remove from the bowl with a slotted spoon and just cook the juice until it turns into a lovely syrup. Add the peaches into the syrup just until heated through.)

Place butter in baking dish and place in oven to melt. You want the dish hot, so don't skip this step.

Prepare the batter. Mix all ingredients in a medium bowl whisking until smooth.

Remove dish from oven and immediately pour in the batter. The melted butter will be displaced and seek the edges. Don't worry. Now, using a slotted spoon, strategically place the hot peaches evenly over the batter. You won't use all the syrupy juice, but don't throw it out ... use to drizzle over portions of finished cake, if desired.


Sprinkle with sugar-cinnamon mixture. Return to oven.


Bake for 25 minutes. The top will have crusted over.


Allow to cool to at least "warm" before cutting and serving. 


Notes: This is a sweet cobbler. You could sub Splenda for some of the sugar. I also like for the butter just to begin to brown a tad for the extra flavor before adding the batter.


The corner and edge pieces are my favorite!


If you enjoy this recipe, add a comment. I love to hear from readers!


Friday, June 24, 2011

Cube Steak Neapolitan


Inexpensive and impressive. Did I say great tasting? Here, the humble cube steak
is garnished with savory tomato sauce, fresh basil, and a mixture of cheeses
to become the star of the show. 

Cube steak, sometimes known as "minute steak," is usually a tough part of beef round that has been run through a mechanical tenderizer. "Cube" refers to the square indentations left in the meat from the tenderizer. It is, indeed, a humble piece of meat literally put through the ringer.

Cube steaks are inexpensive. Traditionally, they are coated in flour then dipped in an egg wash, coated with crushed saltine cracker crumbs, and flash fried. It is served with a milk gravy made from the drippings and called "chicken-fried steak."

They are easily stuffed with spinach and cheese, rolled, and then wrapped in bacon and grilled. 

But my favorite way to prepare them is in the American-Italian fashion of tomato sauce and cheese. Cube steaks come in an array of sizes and shapes. I look for ones the size of a serving portion. The three pictured here were a total of one-half pound and cost $2.47. A real bargain. (Update: 2023 and the price has increased, but they are still inexpensive compared to other cuts of beef).

The recipe below is meant to be more of a guideline. It's the kind of recipe you make up as you go. "Neapolitan" refers to the "layers" of ingredients. Use pasta/marinara sauce you prefer or make your own. I also used a combo of pre-packaged, shredded mozzarella and Provolone cheese. I use canned Parmesan-Romano cheese from Kraft in the bread-crumb mixture. I purchased the cheeses and sauce both on sale. I grow my own basil--you should, too! 

Use "sandwich" pepperoni which most delis will have on hand and slice for you. You want it thin. Thin-sliced Genoa salami will also work. Here's a great trick: Flash fry the salami or pepperoni in a hot oil-less, non-stick skillet. It will only take a minute or so per side for it to become wonderfully crisp and flavorful as bacon. Remove to a paper towel until ready to use. Be forewarned, if you have never done this, you will most likely devour it, so have plenty of hand It's your call.

Avoid "pizza" pepperoni which is too thick, greasy, and filled with preservatives.

After frying your cube steaks, you could also fry up some colored peppers and onions until soft to top the beef. Again, it's your call.

This meal is worthy of guests and easily prepared ahead of time. Arranged on a nice platter accompanied by a bowl of cheesy/garlicky pasta with extra marinara sauce, and a nice side salad, you can't go wrong. For dessert, I suggest something "lemony."
  • 3 cube steaks, total 1/2 pound
  • 2/3 - 3/4 cup dry bread crumbs
  • 1/4 -1/3 cup grated Parmesan from a can
  • 1/4 teaspoon pepper
  • 1/2 teaspoon fennel seeds, freshly crushed (don't omit)
  • Garlic powder
  • Cayenne pepper--a few shakes (optional)
  • 2 eggs, lightly beaten
  • All-purpose flour
  • 6 fresh basil leaves
  • 3/4 cup marinara sauce
  • 1/3 cup freshly grated Parmesan
  • 1/2 - 3/4 cup shredded mozzarella cheese (or three slices)
  • 1/3 cup freshly grated Parmesan cheese
  • 3-6 thin-sliced pieces sandwich pepperoni or Genoa salami (see notes above)
  • Optional: fried peppers/onions

On a plate, mix together the bread crumbs, pepper, freshly-ground fennel seeds, canned Parmesan cheese and sprinkle or two of garlic powder and, if using, Cayenne pepper. Season the cutlets with a bit of garlic powder then dip in flour on both sides and shake off excess. (I didn't use any salt since the cheeses and sauce have plenty already.)

Dip each cutlet into the beaten eggs and then coat with bread-crumb mixture. Allow to sit for about 10 minutes.

Heat a frying pan with enough oil to not quite cover the cutlets. When hot, add cutlets and brown on each side over medium heat. This won't take long. They don't have to cook all the way through since they will also be baking in the oven. Remove to paper towel to drain and then place in a single layer on a baking dish. 

Bake at 350 degrees F for about 10-15 minutes. Remove. If using, top with pepperoni or salami and a bit of your pepper/onion mix. Spoon 3-4 tablespoons marinara sauce over each cutlet. Return to oven and bake another 10 minutes. Remove. 

The humble cube steak all dressed up!

Stack the basil leaves one on top of the other. Now roll them like a tiny cigar. Cut into thin shreds or ribbons (chiffonade). Sprinkle evenly over each cutlet. Cover each one with mozzarella and then the freshly-ground Parmesan. Return to oven to bake just until cheese melts, about a good five minutes. 

Remove. Allow to sit for a bit and serve.


Notes: I'm not a fan of dried bread crumbs, but they work here. You may season them any way you wish, but don't omit the cheese.You may also use Italian bread crumbs. Don't cut the basil until ready to use or it will turn black. In a future version, for even more of taste zing, I imagine sauteing a bit of fresh mushrooms and garlic and then placing that on top of the cutlet with some sliced black olives before popping into the oven.

Sunday, June 19, 2011

Oven-Barbecued Spareribs

Lacking a grill, your oven works well for ribs. Here, they're
served with a side of polenta, a good choice for ribs.


If you don't have a grill and/or you don't want to barbecue in the middle of winter, your only alternative is the oven. Ribs in the oven are remarkably easy to make. Use baby backs and a barbecue sauce you like. I use Sweet Baby Ray's Original. Or make your own.


  • 1, 2-3 pound slab baby-back spare ribs
  • 1 medium onion, roughly chopped
  • 2-4 whole cloves*
  • 2-3 garlic cloves, smashed
  • 10 ounces barbecue sauce (I use Sweet Baby Ray's original)
  • Cayenne pepper
  • brown sugar, light or dark


Remove the thin silver membrane from the back of the ribs and cut the slab into serving-size pieces. Clean ribs by placing in a pot, filling with cold water and draining. Do this several times. 

 I had to settle for pork loin backribs which are not as tender
as baby backs, but they do have more meat.

Fill pot with clean, cold water just until ribs are covered. Add the onion, whole cloves, and garlic. Bring just to a boil. Lower heat and simmer for about 30 minutes. Remove from heat and keep covered for another 30 minutes. (Be careful not to boil your ribs. It will toughen the meat.)


Place ribs meat side up in an oiled pan but do not throw out the braising water. Cover each portion with barbecue sauce. Lightly dust with cayenne by holding the container two feet above ribs and lightly tapping. 


Crumble brown sugar on top of barbecue sauce and cayenne, about 2 tablespoons or so for each portion. Add several tablespoons of water to the pan. Cover tightly with foil and place in a 250-degree oven. After one hour or so remove from oven. The sauce, sugar and water will have turned into a glaze. Baste the ribs with this glaze, including underside and, if necessary, add a bit more water from the braising liquid. Re-cover and place in oven for an additional 60 minutes basting occasionally. Remove and check for tenderness.

Baby backs will cook faster and should be done after two hours in the oven. If the ribs are thick and/or tough you may need an additional hour.


Sticky, sweet and spicy . . . finger licking at it's best!

If you want, place under the broiler for a few minutes to achieve a "grilled" look. Do not step away from ribs when under the broiler. They can burn quickly.

Plate and serve. Have plenty of napkins.

(Serves 2 or, as an appetizer, 4-6)


*Sometimes I omit cloves and use a teaspoon or so of pickling spice--not a lot--just enough to add another layer of flavor to the meat.

Note: Total cooking time in the oven can be anywhere for  2 - 4 hours, so keep that in mind. It's important to keep the ribs covered and a bit of liquid added to they don't dry out. Things will get messy, as the photo above shows. But that's the nature (and fun) of eating ribs!

Friday, June 17, 2011

Buttermilk Pancakes 101

Y'all need to slap your traps with these here flaps! Be sure to warm the maple syrup,
first. Real maple syrup. Not the fake stuff.


I hate buying buttermilk for a recipe because it's expensive and then you're left with most of it after needing only a cup or so for the recipe. But it's what I had to do. So I bought it--then I never got around to making the recipe! So now I have buttermilk. And I've been making and freezing pancakes. Flapjacks. Flaps.

The most difficult part of pancakes for the novice is the temperature of the pan. If you're new at this, an electric skillet works well since it keeps a constant temperature. You might also want a non-stick skillet. It's important to lightly skim the pan with oil; you don't want to "fry" your pancakes. And you don't want the pan so hot that it scorches the first side. Always test things out with just one pancake.

I use my trusty, well-seasoned cast-iron skillet. I put in a tablespoon or so of oil and then use a paper towel to kind of "drain" and skim the pan as I go around it leaving a thin film. A griddle has the advantage of no sides, so it makes it easier to "flip" the pancake. If you're not good at flipping, fill the pan with less, not more, pancakes, and make smaller ones, not larger.

I could have been a bit neater when I flipped this batch.

Note the lack of oil. Nothing beats
a well-seasoned cast-iron skillet! It's easier to flip flapjacks
with less in the pan, not more.

The acid in buttermilk combined with baking powder produces a chemical reaction that causes the pancake to rise. Hence, buttermilk pancakes are fluffier than if made with regular milk. As soon as the batter hits the hot pan, you will actually see the "lift."

Why do I like this particular recipe? I like whisking the egg white and then adding some milk to it and I like adding the yolk to the melted butter. It just makes sense. Pancakes freeze beautifully and make for a quick breakfast or snack.

Use whatever flavoring you'd like to the batter. I like just a touch of vanilla without it overpowering the batter. You may also add a bit of cinnamon and/or nutmeg, apple pie spice. Pumpkin pie spice is especially nice. If using syrup on your pancakes, you don't really need the sugar. If serving with fruit and powdered sugar, then I would certainly add the sugar.

(Makes about 10 - 12 pancakes)
  • 1 cup all-purpose flour
  • 1/2 teaspoon salt
  • 1/2 - 1 teaspoon aluminum-free baking powder
  • 1/4 teaspoon baking soda
  • 2 tablespoons sugar or equivalent of sugar substitute (or none)
  • 3/4 cup whole buttermilk (be sure to shake the container before using)
  • 1/4 cup milk
  • 1 egg, separated
  • 2 tablespoons butter, melted
  • 1/4 - 1/2 teaspoon vanilla
  • A few shakes of your favorite spices (optional)

Begin to pre-heat your electric fry pan or griddle if using. If using a cast-iron skillet, begin to heat on low.

In a medium bowl, mix your dry ingredients.

Nuke the butter just until melted. Add the egg yolk and mix.

In a small bowl or cup, whisk the egg white just until frothy and broken up. Whisk in the 1/4 cup of milk.

Whisk the egg white until light and frothy.

Now add the wet ingredients to the dry, whisking just until well-combined. There will be lumps. You want lumps. Allow mixture to sit for several minutes.

Lumps are okay. You want lumps! Batter will be thick. Allow the batter to sit
for several minutes to begin that "chemical reaction"
between the buttermilk and baking powder.
Pour about 1 tablespoon of oil onto hot pan, 375 degrees if electric, medium heat if using a range. Using a wadded-up paper towel, give the pan a quick skim leaving behind a film. Skim the pan with oil after each batch.

Using a small ladle or 1/4-cup measuring cup with a handle, pour in batter for just one pancake to test the pan. Bubbles should appear on the surface in about one minute. It should be ready to flip after about 2 minutes. Continue to cook for another 2 minutes or so, adjusting heat if necessary, to avoiding scorching.

Finished pancakes can be kept warm in 200 degree oven as you make more.

Man, those were some gooooooood flaps!

To freeze pancakes: allow pancakes to cool. Place no more than two on top of each other and freeze otherwise they will all stick together. When frozen, place in a plastic bag. I use bread-loaf bags that I save. To serve: remove pancakes and place on outer edge of micro-safe dish. Cover with a paper towel and nuke for about 30+ seconds until warm and steamy. Place in the toaster just to crisp the outside. 

For this batch I did not use sugar and I didn't miss it at all.

Tuesday, June 14, 2011

Baked White Fish with Orzo, Tomatoes and Olives


Summer is all about fresh produce and herbs. This recipe capitalizes on both. And it's pretty healthy, too. My summer herbs, kept in clay pots, afford easy accessibility and harvesting.

The original recipe called for shrimp, feta cheese, fresh basil, no black olives, canned tomatoes and baking in a covered glass casserole dish. It was "okay." But it just kind of missed something even though it looked great.


I love the concept of par-boiling the orzo, so much easier than making rice or ribbons of pasta. White fish seemed the right way to go with this, and so I used fresh cod. I also added Greek olives, chopped celery, upped the garlic, swapped out the basil for fresh Italian oregano (milder than Mexican oregano), added some spinach and used goat cheese instead of the feta. Even without the fish, this is a great side dish!!! The briny olives with the fresh tomatoes is classic Mediterranean fare. Use a really good olive oil.

I've used plain goat cheese and flavored. It's really up to you. Just use one that is mild in flavor or that you've already had. I use "La Bonne Vie."

(I had planned to do a nice "photo shoot" for this recipe, but a rain storm blew in at the last minute diminishing any natural light. 

  • 1/2 cup raw orzo
  • 1/2 - 3/4 lb. fresh cod fillet
  • 1 cup sliced grape tomatoes
  • 1/2 cup diced celery
  • 1/2 - 3/4 cup chopped green onion
  • 1 tablespoon finely minced or pressed garlic
  • 1 tablespoon chopped fresh oregano
  • 2-3 tablespoons thawed spinach, squeezed dry (or use fresh)
  • 1/3 cup (about) chopped Greek olives (Kalamata)
  • 2 tablespoons goat cheese
  • 4 small fresh thyme sprigs
  • Salt, pepper to taste
  • Garlic powder
  • Old Bay's Seasoning
  • Lemon
Chop, dice and mince all your vegetables and have them ready to go.

Cut fish in half to fit inside of Dutch oven.

Bring a small pot of water to the boil and add the orzo. Cook for about 6 minutes or so while you saute the vegetables.

In a medium Dutch oven, drizzle about a tablespoon or so of olive oil. Add the chopped celery, onion, and tomatoes and cook over medium heat for about 5 minutes, remembering it will also bake in the oven, so don't over cook them. Add the olives, garlic, spinach and oregano. Stir to warm through. Remove from heat.

Drain orzo and add to vegetables. Stir in the cheese until melted.

The orzo mixture itself is a great side dish.

Lightly dust the fish filet with garlic powder, salt and pepper, Old Bay's. Place fish on top of orzo-vegetable mixture. Squeeze a bit of lemon juice over fish and then drizzle with a bit of olive oil. Place thyme sprigs on top of fish.

Cover. Bake for about 20-25 minutes or until fish flakes. Serve with lemon wedges and additional salt if desired. For wine, pair with a cold Pino Grigio, Chenin Blanc or Sauvignon Blanc.

Monday, June 13, 2011

Throw Away Your Re-Usable Grocery Bags!


Okay. I admit it. I'm a bagger.

No, not as in Tea Party but as in groceries.

Bagging other people's groceries is one of my responsibilities in my new part-time job--which I'm enjoying very much. It's always interesting to see what travels down the black conveyor belt. A person's groceries is their archeological "finger" or "food" print. 

At the end of the belt are three plastic bag holders that I keep open as I begin my sorting in advance: canned goods, soft goods, produce, cold items, meat, etc. The stands keep the bags upright and open and are placed at just the correct, strategic height to make filling them fast and orderly. I can look down into them as I pack them. One hand grabs an item, then passes it to the next hand in a neat exchange of efficiency. The process is streamlined, cost-effective and labor-saving.

I anticipate and triage in advance. Some customers are great and begin thoughtful sorting as they empty their carts. Others are less accommodating and annoyingly  toss their load on the belt eager to be done and gone. "Helpful" children can complicate the process. Men don't empty a cart as much as "dump it."

When it's busy, the process clicks like clockwork. Zip zip zip. Load. Place in cart. "Have a nice day." That is…. until I hear the dreaded words as I'm packing the next customer's load, "I have my own bags!" It's rarely said in a conciliatory tone. It's often menacing and panic-stricken and goes something like this: "STOP! Oh my god!!! Don't let my stuff touch the plastic!  Don't pollute my groceries, my life, my very being. I brought my own bags, you moron!"

Rarely, and I mean rarely, does a person bring recyclable bags because they want to help the planet and our environment. Most just hate plastic bags and the hassle of storing them.

There is no easy way to load recyclable bags. They are made of soft fabrics that don't stand upright. They have to be loaded on top of the counter so it's difficult to see inside and one hand is usually holding open the bag at all times, so it's a one-handed operation. It's slow and tedious. If people have groceries that would normally fill six plastic bags, but they only have two recyclable bags, they don't care. "Just put it all in," they insist. Whatever . . .

Our store policy is that meat is first placed in a plastic bag before being placed into a paper or recyclable bag. It prevents leakage and stains. But plastic is anathema to many of these people. NO PLASTIC! And that includes produce. If they buy six apples, each comes tumbling bruisingly down the conveyor belt. Lettuces, parsley, celery--none is first put into plastic and all is usually dripping wet. All is put naked into the recyclable bag to dampen the contents of everything they touch--including meat that might be leaking blood. Gross.

Unlike plastic bags, or even paper bags, recyclable bags are not standardized. Their geometry is chaotic, especially when it comes time to "squeeze" them into a cart. I don't know why, but people love to bring bags bearing the names of competitive stores. I guess they think it's cute. Maybe they use our bags when they go to other stores. I don't know. I just find it rude.

But my real pet peeve concerning recyclable bags is their unsanitary nature. While we've been indoctrinated with the drill that recyclable is "better," (whole companies satellite this industry) no one argues their unhealthy context. Most--and I mean most--are dirty, soiled, stained and disgusting. They are used over and over and over and never laundered or cleaned. Or even thrown away. They have no business being brought into a grocery store.

Once a woman yelled the obligatory, "I brought my own bags!" and threw two large black bags toward me. I was stunned. They were covered in dog hair! Lots of it. You could even smell it. It was like, "WHAT? You expect ME to touch those, let alone put FOOD into them? Are you just freaking NUTS?" And I work at a high-end grocery store.

"Dog bags" are not uncommon. People keep a pile of recyclable bags in the back seats of their car, apparently. A perfect place for Fido to curl into on a friendly ride. Fleas and all. "No pets allowed" is clearly marked on the entrance door of the store. I guess we need to specify that includes their dander, saliva and germs.

One woman's recyclables resembled a Jackson-Pollock painting. It was covered in multi-colored stains: red, green, blue, black. I gingerly held the strap with my fingers as I pushed in her "food."

God only knows where these bags are stored. Many, I'm sure, are thrown under the kitchen sink next to the trash. They are placed on dirty kitchen floors and counters. Car trunks. They are handled by those who are sick. They are sneezed on. Coughed on. And they have no business in a grocery store where they cross-contaminate everything they touch. Including moi!

Like most grocery stores, mine is committed to cleanliness and freshness. Sanitary wipes greet you the minute you walk in and are even placed around the store for your benefit (and those of others).  And, like most stores, we offer bins for the very plastic bags you hate so much. We will recycle them for you!

Please, keep your dirty laundry at home. Your noble effort to recycle is commendable. Really. But recycling your germs is not!


copyright 2011 Gary T. Czerwinski

Saturday, June 11, 2011

What Do I Eat for Dinner?


What do I cook for dinner most often? I like things that are just as good for leftovers and which freeze nicely, if necessary. In the winter, I'll make lots and lots of soups and casseroles. But with warmer, summer weather, here's a list, in no order of importance, of what I often do actually make. If you're in a recipe rut, chose one to cure yourself. Enjoy!


Fish Cakes. I just love 'em. They're easy to prepare and freeze beautifully.
Kitchen Bounty: Fish Cakes, Fish/Shrimp Cakes

Ziploc Sausages. F-l-a-v-o-r-f-u-l, inexpensive and both fun and easy to make. Again, you can freeze them.
Kitchen Bounty: Homemade Sausages

Company Rice. When I want a starch, I go for this. It goes with just about everything.
Kitchen Bounty: Easy Rice with Spinach and Parmesan Cheese (Company Rice)

Baked Chicken with Bacon and Rice. If you haven't made this yet, you're in for a treat. The rice is the absolute best! And it's just so easy to make.
Kitchen Bounty: Baked Bacon with Rice and Chicken

Baked Spaghetti. I make it more for the leftovers--LOL. I even eat it for breakfast. I like it better than lasagna.
Kitchen Bounty: Baked Spaghetti Casserole

A Simple Lemon Cake. It's just easy to prepare and the taste is always fresh and inviting.
Kitchen Bounty: A Simple Lemon Cake

Mashed Potato Cakes. OMG, I just love these, especially for breakfast with fried eggs on the side.
Kitchen Bounty: Mashed Potato Cakes with Ham, Cheese, and Scallions

Crusty Chicken Tenders with Parmesan. When chicken tenders are on sale, I always grab a pack just for this recipe. The leftovers are wonderful served cold. And you can freeze them before you bake them.
Kitchen Bounty: Crusty Chicken Parmesan Tenders with Fines Herbes

Kreplach. Inexpensive and delicious. Yes, they can take some time, but if you make extra you can freeze them for a quick dinner or lunch.
Kitchen Bounty: Kreplach

Grilled Pork Tenderloin. You really need to grill this. Easy to prepare ahead of time and the leftovers make terrific sandwiches.
Kitchen Bounty: Marinated, Grilled Pork Tenderloin

Rice and Chicken. If you haven't made this, please promise yourself that you will!!!
Kitchen Bounty: Rice and Chicken (Easy Risotto)

Chicken Tenders with Lemon and Rosemary. Again, this is something you prepare ahead of time. It takes all of 15 minutes on the grill.
Kitchen Bounty: Grilled Chicken Tenders with Rosemary/Garlic/Lemon Marinade

Baked Shrimp. I make this a lot!  With a side salad, a hunk of good bread, and a glass of wine, it's restaurant-quality all the way!
Kitchen Bounty: Baked Shrimp


Wednesday, June 1, 2011

Grains, Greens, and Other Good Things (Italian Sausage Casserole)

I love a recipe that's versatile. Here are your options for this one:
  1. A complete dinner
  2. A "light" lunch
  3. A knock-out side to beef or pork
  4. Vegetarian--just leave out the meat
As a side to grilled steak, this is a bomb and a must. If prepared as a complete dinner, use a flavorful Italian sausage. Next time I make this, I just may add some halved cherry tomatoes when I throw in the greens.

If you go the vegetarian route, I'd definitely suggest adding the tomatoes along with some rinsed and drained cannellini beans.

This recipe calls for "escarole" a tender green that is pleasantly bitter. If you can not find escarole, use collard greens or kale. You can also sub "chicory" or frizzy endive. Also mustard greens or arugula. I have not used any of them and, if I had to choose, I would probably use broccoli rabe. You want a green that isn't really "sweet." Of course, this is the kind of recipe in which a garden mix of greens would be wonderful.
  • 2 tablespoons of a good quality olive oil
  • 8 ounces Italian sausage (about 2 links) casing removed
  • 1 tablespoon minced shallot
  • 4 ounces fresh (not frozen) spinach, rinsed and dried, coarsely shredded
  • 4 ounces escarole, rinsed and dried, coarsely shredded
  • 1 tablespoon finely minced, or pressed, garlic
  • 3 cups chicken stock
  • 2-4 tablespoons dry, white wine (optional)
  • 2 teaspoons dried oregano (start with less) or about 1 tablespoon fresh, chopped
  • 4 ounces medium-sized shell-shaped pasta, uncooked (I used orecchiette)
  • 1/2 cup uncooked, long-grain rice
  • 1/2 cup dried, quick-cooking barley
  • Chopped parsley, for garnish (optional)
  • Freshly-grated Parmesan cheese (don't skip)
Preheat oven to 350 F.
Place chicken broth and oregano in a medium saucepan and heat just until boiling. Lower heat and keep at a simmer.

Heat a large skillet, 10-12 inches, over medium heat and add the sausage, breaking up clumps as it cooks (a pastry blender does it fast) and until it is no longer pink. Add the shallot and stir a few minutes. Now add the garlic and stir. Begin adding the spinach and escarole mixing from the bottom up as the greens wilt. It should take no more than 5 minutes. Don't overcook since it will also bake in the oven.

Using a 10-12 cup metal casserole with a lid, scatter the pasta on the bottom and cover with the sausage/greens mixture. Now cover with the the rice/barley mixture. Slowly pour in the reserved broth and bring to a boil. Turn off heat and cover. If adding the wine, do so just before covering and a drizzle of olive oil, if desired but suggested, and then bake in oven for 30 minutes or until pasta is done.

Serve with freshly-grated Parmesan cheese.
Notes: This is adapted from epicurious.com. I used Johnsonville medium Italian sausage. The original does not call for the shallot or wine. I drizzled on some olive oil because it was a really good one. This was done right on 30 minutes. Oregano can be strong in taste, so go easy. I used fresh that I had in the garden. This dish is characterized by its nutty, earthy character with the barley and escarole. Fresh mushrooms would be a nice addition, too.