Index

Thursday, March 29, 2012

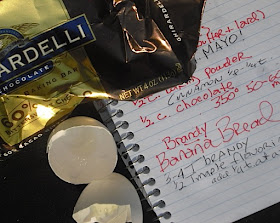
Banana Bread with Brandy, Maple and Chocolate


Bananas and I don't quite get along. I mean, we're friendly and all. But I have traumatic childhood memories. You see, my mother loved bananas. And banana cake. I hated it. But that's what I usually got for my birthday. A banana cake, for heaven's sake! With vanilla icing. When I blew out the candles my wish was to blow away the cake, too.

All I wanted was what any normal kid wanted: chocolate. And lots of it.

It wasn't until I turned ten-years-old that I finally got a decent cake (not that my mother isn't a great cook because she is). 

When I turned ten, I got a genuine bakery cake (no, not as in supermarket bakery--they had not yet been "invented';" this was a REAL bakery). And it was a CHOCOLATE cake! It was decorated with the things I usually carried home as a young boy. Small rocks. Snakes. Frogs. (Plastic, of course--except for the stones.) And, spelled in frosting script, "Happy Birthday Gary."

This was the first bakery in our small 1950's-kind-of town. My mom was ecstatic, not only because she didn't have to bake, but because of the creativity of the final product! I still remember her phoning neighbors and friends to describe this cake. I was special. Screw bananas! My Grandma was there when I blew out those candles. Her gift was not a wrapped present at all. It was a card. And inside was a check for "ten" dollars. My first check! I was sooooo grown up.


To me, "corporate" bananas are a bit sour and the texture is kind of like sucking toothpaste out of a tube. In fact, as a child, I once bit into a banana only to have a baby tooth dislodged.

When I was 19-years-old, I camped throughout East Africa. And I lived on . . . of all things, bananas! (In Swahili [the second most beautiful language next to French] the word is pronounced "bah-nah-nah). But those bananas were like eating vanilla ice cream and nothing like the sad clones sold in supermarkets today under the guise of Chiquita and Dole. And often green, green, green.

Oh, well.

So, I made this bread. Not sure why. 

But, to be safe, I added booze. Maple flavoring. And chocolate. Should have added more maple.

This is a very moist cake. And like any cake or bread with alcohol, it's better served a day or two later . . . But, of course, who can wait?


Use ripened bananas as pictured above. I don't recommend the "freezing" method of bananas. It may make they "squishy" but that's all. By the time bananas reach the blackened stage, they have produced a lot more sugar and taste which is what makes them so appropriate as an ingredient for baking.


  • 1.5 cups flour
  • 2/3 cup light brown sugar
  • 1/3 cup white sugar
  • 1 egg
  • 2-3 ripened bananas (one heaping cup, mashed)
  • 1/2 cup fat - either all butter, half butter half shortening, or half butter half lard (I used the butter and lard)
  • 1 heaping tablespoon mayonnaise
  • 1/4 teaspoon salt
  • 1/2 teaspoon baking powder
  • 1/8 - 1/4 teaspoon cinnamon
  • 1/2 cup bittersweet chocolate, roughly cut (use a good chocolate)
  • 3-4 tablespoons brandy
  • 1/2 teaspoon vanilla
  • 1/2 teaspoon maple flavoring, added 1/4 teaspoon at a time


Mash bananas and add the brandy. Mix. Add maple flavoring 1/4 teaspoon at a time until you get a flavor/blend you like. Add the vanilla. Allow to sit for at least one hour.


Preheat oven to 350 F degrees. Grease/spray a 9 x 5 bread pan. Cut a piece of parchment paper or waxed paper to fit into the bottom. Grease/spray that, too.


Measure your flour, salt, cinnamon, and baking powder. Set aside. Rough chop your chocolate.


In a medium bowl, add the brown and white sugar with the fat. Using a hand-held electric mixer, beat for three minutes. Add the egg and blend well.


Add the banana mixture and gently mix to incorporate. Mix in the one tablespoon mayonnaise and blend well.


Add the dry ingredients and mix by hand with a wooden spoon or spatula just until streaks of flour disappear. Add the chocolate and stir just until incorporated.


Spoon into pan and bake for 50-60 minutes or until an inserted toothpick comes out clean. 


Allow to rest in pan for 15-20 minutes before removing and cool completely before cutting.


Notes: I used a convection oven set at 340 F degrees and baked mine for 55 minutes. These would great as cupcakes, just vary the baking time.

Tuesday, March 20, 2012

Bacon-Infused Pasta, Jalapeno Cream Sauce & Chicken


Did I have you at "bacon?" Or maybe it was that word 'infused." What a lovely thought: a bacon infusion. Someone call 9-1-1! Surely, a cure for anything!

As you may notice, I've been on a pasta kick lately (and I still have brandy pasta to come). It's just so easy to prepare and a meal in-and-of itself. I really had planned to add a handful of frozen peas to this recipe, but they were nowhere to be found in my freezer. And, yes, I used canned mushrooms, not fresh. I have no quarrel with canned mushrooms. For one thing, they keep their shape when cooked. Second, I make judicious use of the juice (how's that for a rhyme?). Never throw it out. If you have fresh on hand, by all means add them and sub chicken stock for the mushroom liquid.

The chicken in this recipe really serves as an afterthought: it's merely the "designated driver" for the intoxicating bacon. And, really, there isn't that much bacon. As usual, I trim most of my bacon before frying. Adding a piece of bacon to the pasta water steers the taste to a new direction. But it all arrives home safe-and-sound with the cream sauce and jalapeno. The sauce is not meant to be hot or spicy. It's that depth of smoky flavor it adds.

Next time, I may just sear the tenders and serve on their own. It's your call. But I would add a handful of peas to the pasta water just before it's done.


  • 1/4-1/3 cup trimmed, smoked bacon (I used thick-sliced)
  • 1 tablespoon chopped jalapeno + 1 teaspoon, reserved, ribs and seeds removed
  • 2 large garlic cloves, sliced, + 1 reserved
  • 1 cup chunked chicken tenders
  • 1 4-oz. can mushrooms, drained, juice reserved
  • 1/2 cup cream
  • 1/4 cup dry, white wine
  • 4-5 ounces spaghetti
  • Parsley
  • Salt and pepper
  • Parmesan-Reggiano
  • Frozen peas (optional) about a handful


Trim, wash and pat dry chicken tenders. Cut into thirds or fourths.


Fry bacon just until it begins to crisp remembering it will also cook in the sauce. Remove from pan to drain. Add a bit olive oil to pan and add the chicken, searing just until it begins to brown. Add a bit of salt and pepper. Remove.

Be sure to taste your jalapeno before cooking with it.
Some are hot. Some are mild.
Remove the inside white rib and seeds--
that's where the most of the heat resides.


Add a bit of olive oil to pan and add the one tablespoon chopped jalapeno. Stir just until it softens, about one minute. Add the two sliced garlic cloves. After about a minute or so, add the wine to de-glaze the pan stirring up the brown bits. Add the mushroom juice. Stir. Add the cream. Bring just to a boil then lower heat. Add bacon and simmer until thick, a good 5-8 minutes. About halfway, taste for seasonings and, if necessary, add the reserved jalapeno and garlic. Add several grates of cheese and mix through.

Meanwhile bring a pot of salted water to a boil with about one-half to one piece of bacon. When boiling, add your pasta and cook. Just before done, add a handful of frozen peas, if using. Drain. Remove and discard bacon.


Once the sauce thickens, return the chicken to the pan over low heat. Add pasta to pan with sauce and chicken, stir through. Add about 1/4 cup grated cheese and stir through, allowing pasta to absorb the sauce. Add a bit of chopped parsley.

Plate and serve with addition cheese grated over the top. Yea it's all about going over the top  .  .  .


Tuesday, March 13, 2012

Pan-Seared Chicken Thighs with Garlic/Lemon Pasta


Make this ... and you will  be happy!


The pan sizzles. It sputters. It pops. My stomach grumbles. Beneath the lid, I know precisely what's going on. The chicken skin is caramelizing--rendering its fat to become bacon-crisp. The meat is being steamed, juicy and tender.

When "I want dinner and I want it NOW!" this is the recipe I turn to, sometimes twice a week. Pan-fried chicken thighs. A chicken thigh is still less than one dollar and offers a juicy, meaty cut of meat. Seasoned well and with the skin oh-so-ever crisp, I never tire of that first crunch when I bite into it.

Served with simple pasta and veggie, it's really a wonderful dinner any time of the year and done within 30 minutes. And in one pan ... and a lid! Easy clean up!

A lot of the fat (schmaltz) from the thigh will be left behind in the pan. That deep caramelization of the skin will intensify the actual taste of chicken, which is so often tasteless and bland. Season the underside any way you wish, but do not be stingy. And, as I always say with chicken, use thyme.

This technique is pure Jacques Pepin, best friend to Julia Child.

The pasta is simple enough and is actually my "everyday" pasta. In the summer, I throw in some fresh basil and cherry tomatoes. You can vary the cheese, too. Feta works well and, if you have them on hand, some Kalamata olives. You really can't screw it up. And it is only one more pan for clean up ...
  • 2-4 skin-on, bone-in chicken thighs (I have only used two)
  • Dried, savory seasonings of your choice (be very generous and think KFC and one hundred herbs and spices, but not hot and spicy unless that is what you prefer)
  • 4-6 ounces spaghetti
  • 1 garlic clove, pressed
  • 1 tablespoon olive oil
  • 2 teaspoons butter
  • Lemon zest
  • Salt and pepper
  • Parsley for garnish
Using a sharp knife, cut along each side of the thigh bone being careful not to cut through to the skin on the other side. Scrape back the meat on the top of the bone. You just want to release the meat a bit from the bone so that it cooks evenly. The bone adds a lot of flavor. (I do this every time I cook thighs.)


Season liberally. Here are some seasonings I use: Bell's, Cavendar's, Old Bay, Montreal Chicken Spice, fines herbes, garlic and onion powder, smoked paprika, Aleppo pepper. But whatever I use, I always add a dried thyme flakes. Chicken and dried thyme just go together.


Place thighs in a cold non-stick skillet, skin side down, over medium-high heat. Do not add any oil of any kind. After a minute or so, move them around to make sure they are not sticking. When they begin to sizzle a bit, dial down the heat to low/medium. Cover. Cook for 16-18 minutes without turning. It's tough. You will want to fuss ...  Don't. 


The temperature will depend on your pan. If it's heavy, you can dial up a bit more than if it's thin. I have an electric stove, and I usually cook them around the number-4 mark. This may take some practice. Just do not flip them.


When done, give a quick turn to simply sear the bottom. Remove to a plate, cover, and allow to rest several minutes before serving. Save fat in pan to add to pasta.


Outdoor grilling can dry out a thigh
even though it gives a great crunch
and a bit of a burn. Here,
the temperature and cooking is controlled.


MAKE THE PASTA

Bring a large pot of water to a boil. Add a heaping tablespoon of salt. Add your pasta and partially cover the pot.  When it returns to a boil, reduce heat just a bit to prevent it from boiling over. Cook until done, about 7 minutes or so. I do not subscribe to "al dente" pasta. I like it cooked through and soft.

In a medium bowl, add your garlic, one tablespoon olive oil, 2 teaspoons butter and a good teaspoon of Kosher salt along with several grinds of pepper or Aleppo pepper for a bit more kick and flavor.

Remove a bit of water from pasta pot and reserve.

Drain pasta. Add to bowl with garlic mixture and toss. Add a bit of the 'schmaltz' or chicken fat from the pan to the pasta. Add several fine grates of lemon peel (not juice) and a generous handful of Parm/Reggiano cheese. Taste for salt. Add some chopped parsley. If you don't have any, chop up some celery leaves to add.

If your pasta is done before your chicken, add a bit of the pasta water before serving to loosen it up. Don't be afraid to add a drizzle of olive oil over pasta when plated.


Notes: One day I will make a wonderful sauce from remnants of the chicken pan. You might want to give it a try.

Saturday, March 10, 2012

Olive Oil Cake with Citrus and Amaretto


I really like this cake. I've had the recipe forever and don't even remember where I got it. But ever since I saw an olive oil cake on 101 Cookbooks I was intrigued.

Did someone say a SUNNY recipe? I love European butter for cooking.
It's not as oily and the cows are grass-fed.


But, honestly, I made this with trepidation. I shy away from breads and cakes with a ton of oil because, well, that's usually what they end up tasting like. But the citrus and the liquor cut down on the "greasiness" here. I also subbed some of the olive oil with melted butter to give an added richness. And I added lemon zest. Be sure to use a quality extra-virgin olive oil, one that is fruity if possible. I used Colavita.

To me, this is an "adult cake." It's not overly sweet and has a mature, moist crumb. The citrus lingers on the palate and the Amaretto is a subtle blend. The edges have a nice crust that works well with the stone-ground corn meal. These would be killer muffins. I could also see adding poppy seeds to the batter.

The batter is very thin and I had to go back to the recipe to make sure I hadn't added too much milk. In the oven, it had a beautiful rise. I baked mine in a convection oven at 340 F degrees for about 45 minutes. Be sure to use parchment on the bottom of the pan.


  • 3 large eggs
  • 1 cup granulated sugar
  • 1 1/2 cups whole milk
  • 3/4 cup extra-virgin olive oil
  • 1/3 cup butter, melted
  • 1/4 cup amaretto liqueur
  • 1 tablespoon, packed, citrus zest from one orange and one lemon
  • 1 1/2 cups all-purpose flour
  • 1/2 cup coarse-ground cornmeal (I used Red Mill stone ground)
  • 3/4 teaspoon baking powder
  • 1/2 teaspoon baking soda
  • Dash of salt


Heat oven to 350 F degrees. Spray/butter/grease a 9-inch cake pan. Cut a round of parchment paper to fit in the bottom. Place in bottom and spray/butter/grease that, too. 

In a medium bowl, stir the flour, cornmeal, baking powder and baking soda. Add the zest and, using your fingers, gently work it into the flour. 

In a large bowl beat eggs and sugar until light and sugar has dissolved. About 2 minutes. Add milk, olive oil, and amaretto. Blend.

Add dry ingredients to wet stirring/whisking just until blended. Batter will be thin. Some lumps are okay. Don't over mix.

Pour batter into prepared pan. Bake until top is brown and set and a toothpick inserted into center comes out clean, about 40-50 minutes. Remove from oven. Allow to rest 15-20 minutes. Run a knife around edge of pan to loosen. Turn onto rack then place another rack on bottom and flip so it is now right-side up. Allow to cool completely.

This cake has color and texture from the cornmeal.


When cake has cooled, dust with confectioners' sugar. Cut into wedges to serve.


Notes: The original recipe said to allow it cool completely in the pan before removing, but that always makes me a bit nervous. Next time I might add a few drops of almond oil to boost its flavor. My orange was really big, so you may need two. Don't use the zest from an old orange--it's dry and bitter.


Friday, March 2, 2012

Pasta with Lemon


Buttery, slippery, garlicky, salty--that's how I like my pasta. Liberal shaves of a great Parmesan and almost always a few grates of fresh lemon zest. Sometimes a pinch of red pepper flakes. The recipe below combines all those ingredients, but ramps up the lemon for a flavorful pasta to welcome spring.

This is based on a Cook's Illustrated recipe. I added the garlic, red pepper flakes and upped the butter. Butter always adds a richness to pasta dishes. Use a quality cheese and salt. If using sea salt, go easy and add gradually. I usually use kosher salt. This wonderful paired with a supermarket rotisserie chicken for a quick weeknight dinner or weekend summer picnic.


(Serves 2-4)

  • 8 oz. quality spaghetti
  • 2-4 tablespoons extra virgin olive oil
  • 1 tablespoon butter (I used Plugra)
  • 2 tablespoons minced shallot
  • 1 small garlic clove, pressed
  • 2 tablespoons cream (or sour cream)
  • 1 teaspoon finely grated lemon zest
  • 2 tablespoons lemon juice
  • 1/2 cup grated Parmesan (I used Grana Padano)
  • Red pepper flakes, just a pinch or two
  • 8 basil leaves, shredded, plus more for garnish
  • Salt and pepper


Bring a large pot of salted water to boil. Add pasta and cook until done, reserve one cup of the pasta water before draining.


Add about one tablespoon olive oil to the pasta pan and add the minced shallot and red pepper flakes. Cook for about 2 minutes being careful it doesn't burn. 

Remove pan from heat and add 3/4 cup of the pasta water and 2 tablespoons of the cream. Bring to a simmer and allow to cook for about 2 minutes.

Return the pasta to the pot and stir until coated with the sauce. Stir in another 1-2 tablespoons of olive oil, the butter, lemon zest, lemon juice, about half the cheese, garlic and salt and pepper to taste.

Cover and allow to rest several minutes. If necessary, add a bit more of the pasta water, butter and/or olive oil. Don't be afraid to add more cheese. Stir in basil leaves. Taste for salt.


Drizzle individual portions with a bit more olive oil and sprinkle with grated cheese.


A bowl of leftover pasta such as this makes for a great lunch. It's easily warmed in the mircrowave. The longer this sat, the better it got!

(Notes: If you want a more mild flavor to the garlic, add it to the shallot mixture just before adding the liquid.)